How to lay artificial grass
Laying artificial grass sounds like a walk in the park – just roll it out like nature’s red carpet and away you go. Although entirely possible to do yourself, it isn’t quite as simple as just rolling out the grass. There are some key steps to follow. But not to worry, below we have a comprehensive guide outlining the tools and equipment that you will need. Tools and Equipment available from your local Tippers branch or Tippers Tool Hire.
Equipment & Materials required:
• Turf Cutter
• Shovel
• Utility Knife
• Joining Tape (where 2 pieces
of grass are to be joined
together)
• Joining Adhesive
• Tape Measure
• Galvanised Nails/Screws
• Hammer
• Stiff Brush
• Geotextile Membrane
• MOT Type 1 for foundation
layer under grass
(50mm-80mm depth)
• 6mm Granite Dust for top layer
under grass (25mm depth)
• Plate Compactor
• Kiln-dried sand for dressing
on top of grass (optional)
• Blower
• U-pins
Overview of Installation Method: In order to lay your artificial grass, there are 6 key easy steps to follow.
These have been summarised below:-
- Plan out and prepare the area where you wish to install the artificial grass.
- Create perimeter borders, where necessary, within which to contain the MOT Type 1 and Granite Dust and also to ensure neatly-finished edges.
- Install Geotextile Membrane.
- Create a smooth and level surface using a sub-base of MOT Type 1 and Granite Dust.
- Install the artificial grass and trim the edges to fit for a neat finish.
- Apply a top dressing of kiln-dried sand in order to help keep the grass pile upright and prevent the fibres from leaning over resulting in a more natural-looking surface. (optional)
Here are the 6 Steps in more depth:-
Step 1: Planning & Groundwork Preparation
Before you jump in and get started it is important that you plan ahead to ensure that you have enough material to cover the chosen area. As well as having the correct measurements, and we would recommend measuring several times to ensure the correct sizes are recorded, it is also important, as a matter of safety, to ensure that any water pipes and/ or cables that may be contained within the area are below digging depth. An important consideration when considering artificial grass is that dependent upon the quality of the grass chosen, it is available in 2m, 4m and 5m widths. The 2m and 4m widths will colour match (as they are cut from the same roll) but the 5m grass is made on a separate machine. If you imagine the scenario when dealing with wallpaper batches, this is the same with 2m/4m and 5m grasses. Whilst every effort is made during the manufacturing process to get as close a colour match as possible, this cannot be guaranteed between 2m/4m and 5m widths. Using a turf cutter, remove the existing turf and clear any bricks, stones or other debris that will prevent you from creating a smooth, level surface. Dig out the ground to a depth of 75mm-100mm dependent upon ground conditions. The depth of the sub-base will be dependent upon ground conditions. Where ground conditions are wetter, it is advisable to dig deeper foundations in order to aid drainage. If the ground is waterlogged, then you may wish to consider additional suitable drainage.
Step 2: Create Perimeter Border
Create perimeter borders, where necessary, within which to contain the MOT Type 1 & Granite Dust as well as to ensure neatly-finished edges.
Step 3: Apply Geotextile Membrane
Install the Geotextile Membrane with U pins, in order to prevent movement.
Step 4: Lay the Sub-Base
Add 50mm-80mm of MOT Type 1, level out and compact using a plate compactor. Add the layer of Granite Dust (20mm-25mm) and level and compact again. Dry weather conditions are advisable during the addition of the Granite Dust stage.
Step 5: Install the Artificial Grass and Trim Excess
You are now ready to lay your artificial grass. Time and weather permitting, if you can unroll your artificial grass and let it acclimatise, particularly in warmer weather, the appearance of the grass fibres will improve. If not, then simply unroll the artificial grass over your chosen area. The direction that you lay the grass in is entirely up to you. However, there is a pile direction (ie the direction in which the pile runs) and, although down to personal preference, in order to achieve the best overall appearance, it is recommended to look into the pile of the artificial grass.
Step 6: Get the Natural Look
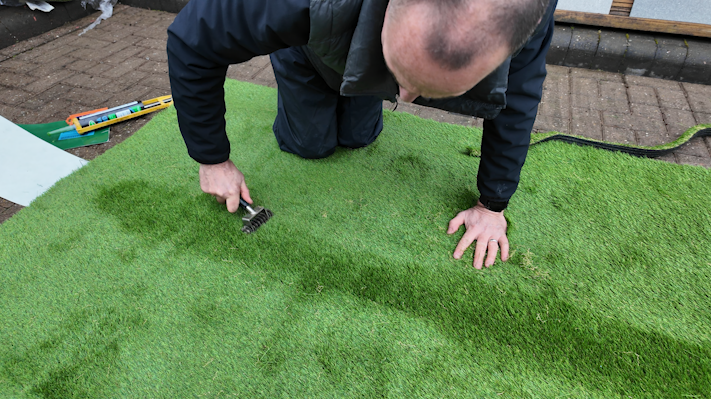
Now that you have laid your artificial grass, it’s time to give your new lawn a more natural look. Using a stiff brush and/or blower (if available), remove any grass fibres/debris from the newly-laid lawn. Once the lawn is clear, evenly spread approximately 6kgs-8kgs of kiln-dried sand per m2 dependent upon the pile height of the grass. Brushing against the pile, will help to distribute the sand evenly. Although optional, a sand dressing will help to give your artificial grass a natural finish as well as to protect and stabilise the grass fibres.
Step 7: Final Step Relax and enjoy your beautiful, new artificial lawn.
Where the size of your garden means that you need to join 2 pieces of grass together, then simply follow the next steps for the best results:-
How to join 2 pieces of grass
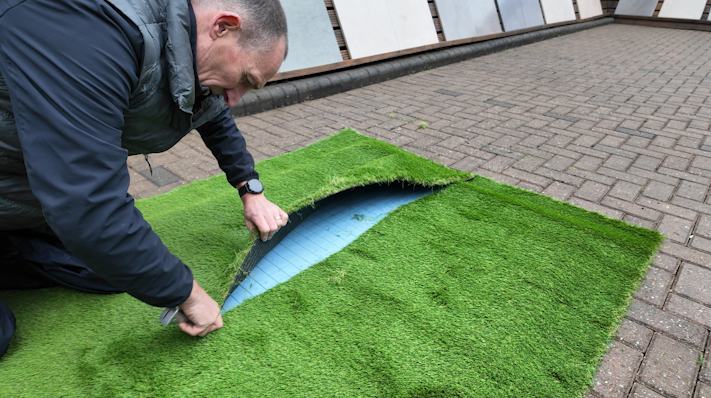
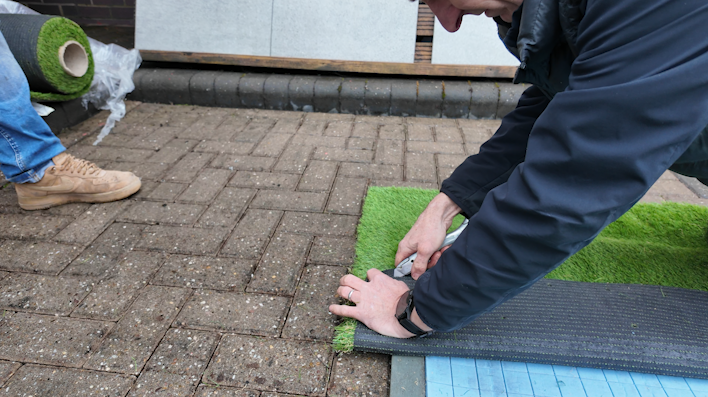
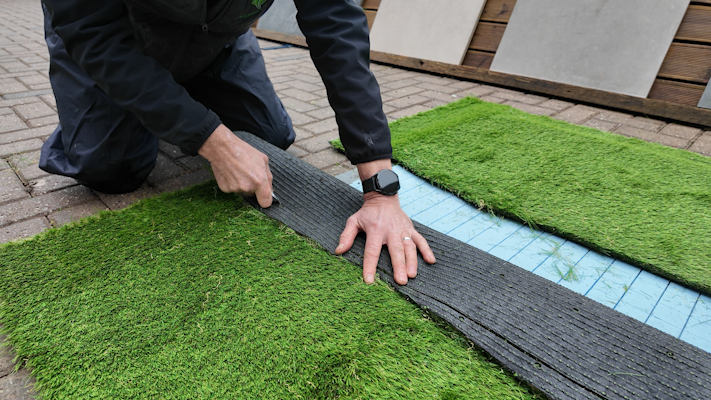
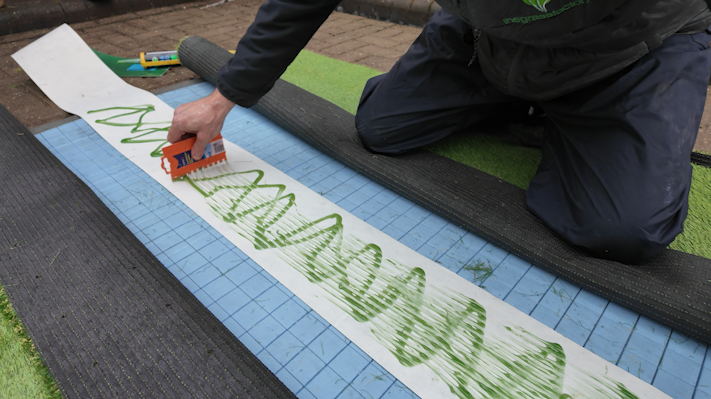
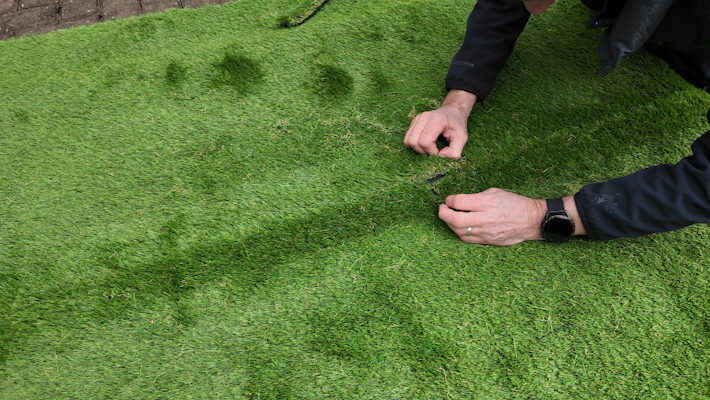
When joining two pieces of artificial grass, align their pile directions to ensure they appear as a single piece. Trim edges close to the stitch-line to avoid gaps. Position the grass pieces on the intended area, ensuring edges are butted together. Fold edges back, place jointing tape (green side down) along the joint, and secure the tape ends. Apply adhesive in a zig-zag pattern on the tape’s white side, leaving 25mm uncoated at each edge. Use a notched trowel to spread the adhesive, creating ridges high enough to adhere to the grass back, not just the stitches. Typically, one adhesive cartridge is used per 1.5 to 2 linear meters of tape, but avoid excess glue that could reach the grass tufts. Press the grass onto the adhesive, ensuring no fibers are trapped. Immediately remove any glue on the tufts. Check for raised areas along the joint, adjusting as needed to ensure close alignment. Weight the joint while the adhesive sets, with setting time varying based on temperature. The adhesive should not be used in temperatures below 4 degrees Celsius. For sand dressing, apply in dry weather using dry sand. Brush the sand into the lawn, allowing it to sink and support the grass fibers. This improves lawn appearance and extends the artificial grass’s lifespan.
Prefer to watch the video
Aftercare guide
No mud, no mess, no mowing… Now your artificial grass is installed you can really start to enjoy the benefits of a hassle-free lawn. However, there are a few do’s and don’ts to ensure that your new lawn stays in the best possible condition and looking at its best. If you follow these few simple tips, you will maintain its appearance as well extend the life of your lawn.
DO
Regularly remove leaves, twigs, and other debris (e.g., monthly) to prevent growth of organic matter on the lawn. Tools like a leaf blower or a stiff brush can effectively clear surface debris. Regular brushing maintains the lawn’s pile, preventing flattening. Brush against the pile direction to keep it upright. For pet owners, promptly clean up waste and rinse the area with warm soapy water or diluted disinfectant. Regularly rinse areas affected by dog urine to reduce odors. During dry periods, hose down the grass to flush out residues. Artificial lawns can support heavy objects like garden furniture, but these may flatten the pile. It will recover once the object is removed, and brushing can help restore it. Shift heavy objects periodically to prevent prolonged flattening. When painting fences, cover the artificial grass to avoid drips or spills that are hard to remove.
DON’T
Do not have any naked flames near your artificial grass. Sparks from firepits, BBQs, bonfires or fireworks will melt the artificial grass. Avoid charcoal BBQ’s directly on top of your artificial grass. Cigarettes which are not properly extinguished and are thrown on the grass will melt the grass. Avoid parking cars, vans, motorhomes, caravans or motorbikes on the grass for long periods as this will lead to compaction of the grass. Do not throw chewing gum onto the grass or allow any adhesive/sticky product to get onto the grass as this will be difficult to remove. The only option may be to cut out the affected areas which may spoil the overall appearance of your lawn. If you follow the simple Do’s and Don’ts above, then you will protect and preserve your lawn for many years to come.

